Debug configuration and Firmware download
Prerequisite
Flash programming algorithm file should be copied to IDE and Debugger folders before trying to debug or download firmware. Please following these steps:
- Copy file [SDK Dir]/tools/prog_tool_v2/JLinkDevices.xml and folder [SDK Dir]/tools/prog_tool_v2/BlueX/ to folder [JLink Dir].
- (For Keil Only)Copy files [SDK Dir]/tools/prog_tool_v2/BlueX/* to folder [Keil Dir]/ARM/Flash/.
Keil Configuration
- Power up the development board. Connect JLink to the board.
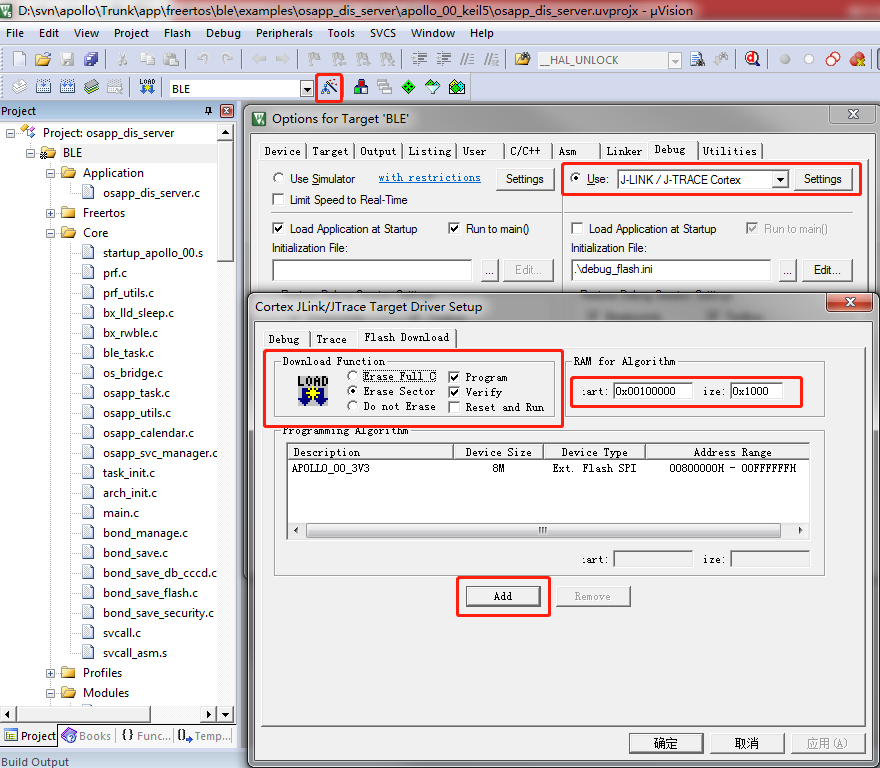
- Open Keil project,Click Project->Options for Target ‘*’->Debug, select Use “J-LINK/J-TRACE Cortex”. Deselect “Load Application at Startup”.
- Then click Settings->Flash Download. Select “Erase Sectors”, “Program” and “Verify”. Set “RAM for Algorithm Start: 0x100000, Size: 0x1000”
- Click Add, Select “APOLLO_00_1V8” or “APOLLO_00_3V3” according to your Flash voltage.
- OK.
Eclipse Configuration
Open Eclipse, import the project. Build a target. Click Run->Debug Configurations.
Double click GDB SEGGER J-Link Debugging to create a debug configuration.
In the page Main, click Search Project to select the elf file built just now.
In the page Debugger, set Device name to “APOLLO_00_1V8” or “APOLLO_00_3V3”. Set Other options to “-singlerun -strict -timeout 0 -jlinkscriptfile JLinkSettings.JLinkScript”.

In the page Startup, select “Initial Reset and Halt”, “Enable flash breakpoints”, “Load symbols: Use project binary”, “Load executable: Use project binary”, “Pre-run/Restart reset”. Deselect “RAM application(reload after each reset/restart”, “Set breakpoint at: main”, “Continue”.
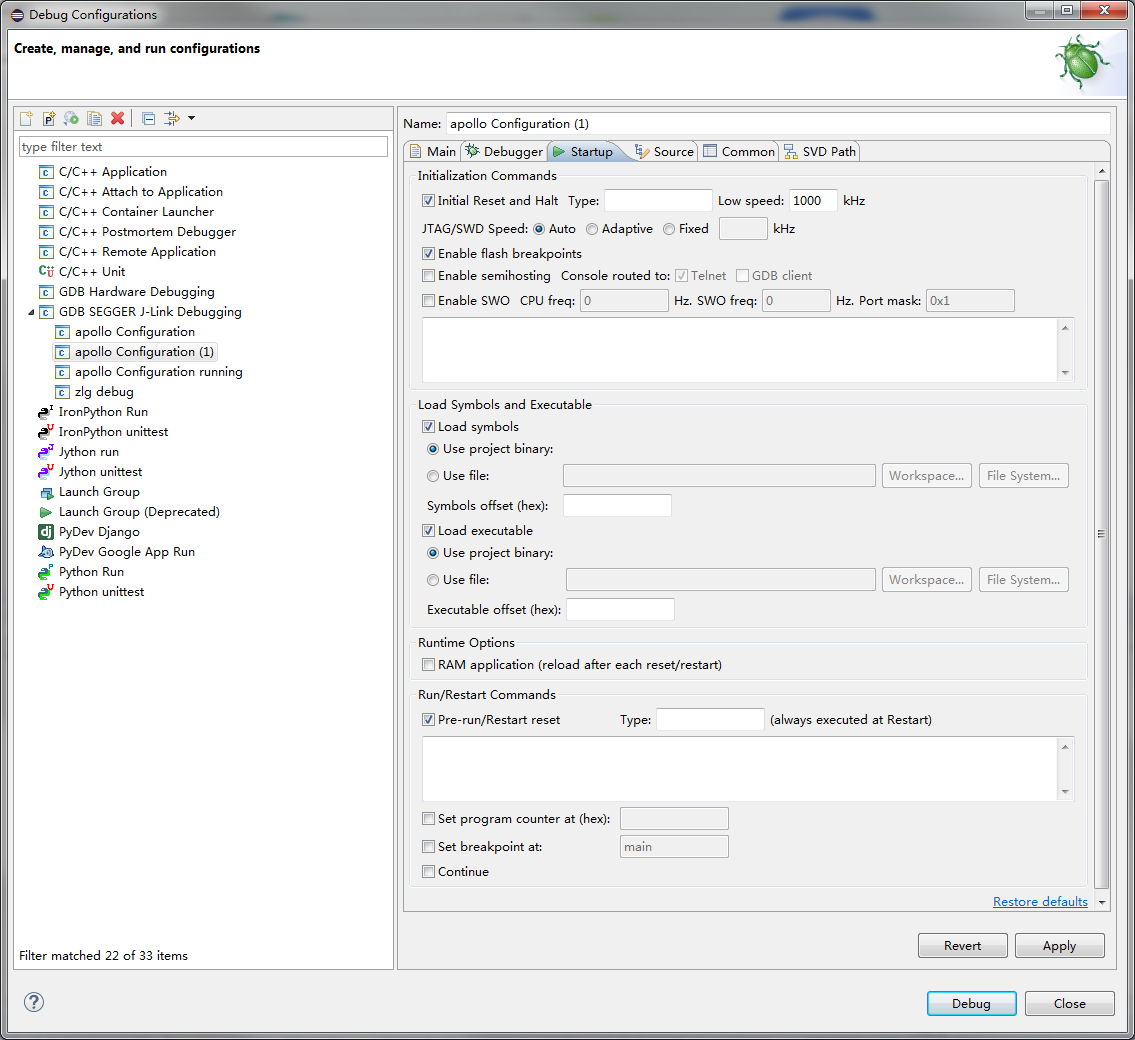
Apply.
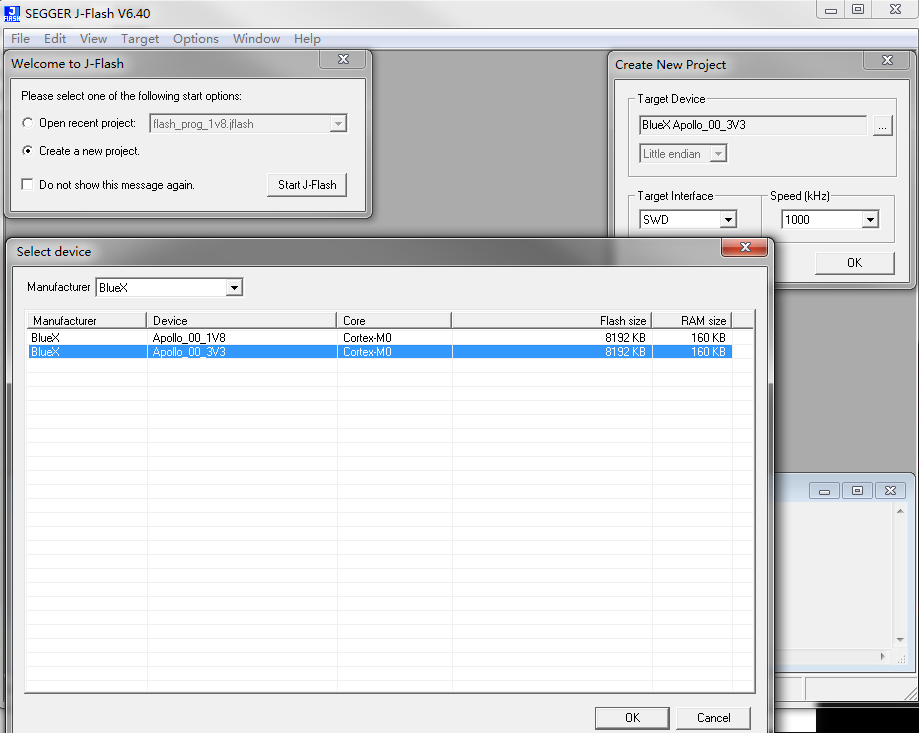
Firware download by J-Flash
- Open J-Flash. Create a new project.Select “BlueX Apollo_00_1V8” or “BlueX Apollo_00_3V3” as Target Device. Click OK.
- Press F3 to Erase all Sectors or F4 to Erase Chip.
- Open the hex file. Press F7 to automatically program and verify.